In this post, we feature a comprehensive Tutorial on How to install Apache web server. This article is part of our Academy Course titled Apache HTTP Server Tutorial.
In this course, we provide a compilation of Apache HTTP Server tutorials that will help you get started with this web server. We cover a wide range of topics, from installing the server and performing a basic configuration, to configuring Virtual Hosts and SSL support. With our straightforward tutorials, you will be able to get your own projects up and running in minimum time. Check it out here!
In this example we will show how to install the Apache web server in CentOS 7.2 and Ubuntu 14.04.3 using the command line. According to recent reports, Apache continues to keep the lead in the number of websites and Internet-facing machines when compared to other web servers, such as Microsoft’s IIS or Nginx.
Such has been the case for a long time, and that is why the skill of knowing how to install, configure, and leverage Apache is on the rise everywhere.
In other words, by acquiring Apache skills you will learn how to use the number one server on the Internet.

1. Installing Apache and utilities
Perhaps the first thing that we need to note is that the package that includes Apache has different names in CentOS (httpd) and Ubuntu (apache2). The good news is that in both cases, the package is included in the repositories that are configured when the operating system is installed. For that reason, you do not need to make any modifications to the repositories in order to install Apache.
In addition, we will install an extra package named apache2-utils and httpd-tools in Ubuntu and CentOS, respectively. This package includes tools that will be useful to benchmark Apache, manage basic and digest authentication to web pages, and resolve IP addresses to host names in the logs, among other things.
However, before you proceed please keep in mind that installing packages require administrative privileges, so you will need to run the following commands either as root (in CentOS) or using sudo (in Ubuntu). With that in mind, let us proceed with the installation.
In CentOS, type
yum update && yum install httpd httpd-tools -y
and press Enter.
In Ubuntu, do
sudo apt-get update && apt-get install apache2 apache2-utils -y
The package management system (yum or apt-get) will take care of installing all necessary dependencies required by the web server.
2. Checking running status of Apache
Once the installation completes, we need to check whether the web server has been automatically started. Typically, that is the case in Ubuntu but not in CentOS.
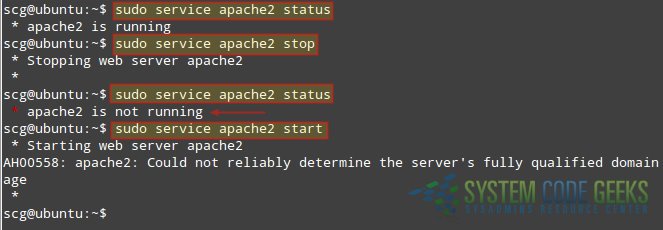
To check the running status of Apache in Ubuntu, type
service apache2 status
In Fig. 1 you can see the expected output when the web server is running. Otherwise, if it is stopped (as we forced it to using
sudo service apache2 stop
which is also shown in the image) you will need to run
sudo service apache2 start
to restart it. By now, you can safely ignore the AH00558 error message as it refers to an aspect of the web server configuration that we will cover in the next tutorial of the Apache series.
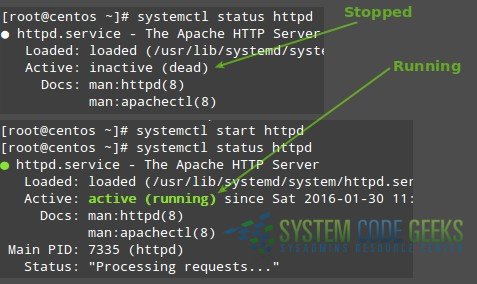
In CentOS, you will use systemctl (the system and service manager tool) to verify the status of Apache:
systemctl status httpd
Fig. 2 shows the expected output when the web server is running and when it is not.
Last but not least, we need to ensure that the web server is started automatically the next time the system boots. In Ubuntu, the installation process by default will configure it to start after a reboot whereas in CentOS, you will need to start it by hand:
systemctl start httpd
and enable it for future reboots:
systemctl enable httpd
This ensures that Apache will be started by systemd each time the machine boots.
In Ubuntu, you can also get more information about Apache (web traffic statistics, server load and uptime, percentage of CPU usage, number of requests currently being processed, to name a few examples) using
apachectl status
In CentOS this command is aliased to
systemctl status httpd
so you will not get more details than those shown in Fig. 2).
3. Serving your first website with Apache
After you have successfully installed Apache and got it running, it is time to look into serving web pages. Although we will discuss this further in later articles, you need to know that Apache not only is used as a standalone server (that is, to store a single website or application), but also to run several sites (also known as virtual hosts) at the same time.
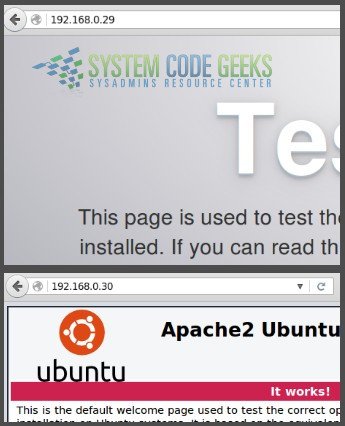
For the time being, it is sufficient to indicate the place where the web server stores pages and see how it returns them upon a request performed by a client – all in the context of a standalone server. To see Apache in action for the first time, launch a web browser and point it to the IP address of the machine where Apache is running, as shown in Fig. 3 (192.168.0.29 is a CentOS and 192.168.0.30 is Ubuntu).
If you cannot see the test page after starting Apache in CentOS and your web browser says it can’t establish a connection to the web server, please check the following:
- Did you misspell the IP address in the browser’s URL bar?
- Is firewalld, the default firewall in CentOS 7 allowing http traffic?
You can check #2 as follows:
Type
firewall-cmd --add-services=http
then
firewall-cmd --add-services=http --permanent
and hit Enter. Then try to access the web server by IP as explained earlier.
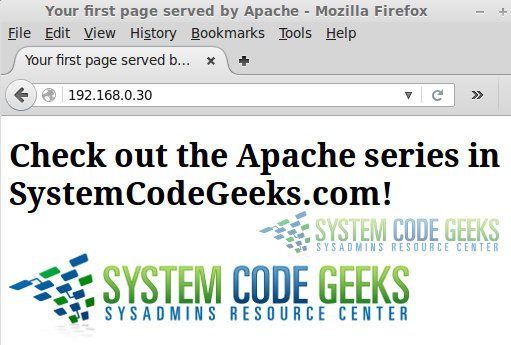
To replace this default test page by one of ours, create a simple html file and save it as index.html in /var/www/html. You can use the following example if you want:
<!DOCTYPE html>
<html>
	<head>
	<meta charset=utf-8 />
		<title>Your first page served by Apache</title>
	</head>
	<body>
<h1>Check out the Apache series in SystemCodeGeeks.com!</h1>
		<img src="http://systemcodegeeks.javacodegeeks.netdna-cdn.com/wp-content/uploads/2016/01/SystemCodeGeeks-logo.png" />
	</body>
</html>
The result can be seen in Fig. 4:
Next, feel free to create other subdirectories under /var/www/html and more html pages, and hyperlinks between them.
Congratulations! You have already taken your first step towards mastering Apache.
4. Wrapping up
In this tutorial we have explained how to install Apache, the most used server used by websites and Internet-facing computers, in CentOS 7 and Ubuntu 14.04. In addition, we showed you how to replace the default test page with a custom one.
In the next articles of this series, we will discuss in greater depth the capabilities of Apache. Stay tuned.
