In this post, we feature a comprehensive Nginx SSL configuration guide. This article is part of our Academy Course titled Introduction to Nginx.
This course will introduce you to the magic of nginx. You will learn to install and configure nginx for a variety of software platforms and how to integrate it with Apache. Additionally, you will get involved with more advanced concepts like Load Balancing, SSL configuration and Websockets proxying. Check it out here!

Table Of Contents
1. Introduction
The SSL (Secure Socket Layer) protocol was created by Netscape to ensure secure transactions between web servers and browsers (using secure pages often identified with https://). The protocol uses a third party, a Certificate Authority (CA), to identify one end or both ends of the transactions. [1]
2. Adding support for SSL to Nginx
Since The Linux Documentation Project website offers a comprehensive explanation of how this procedure is performed, we will limit this tutorial to show how to set up SSL with Nginx on Ubuntu 12.04 LTS. We will need to compile Nginx with SSL support (see Fig. 1).

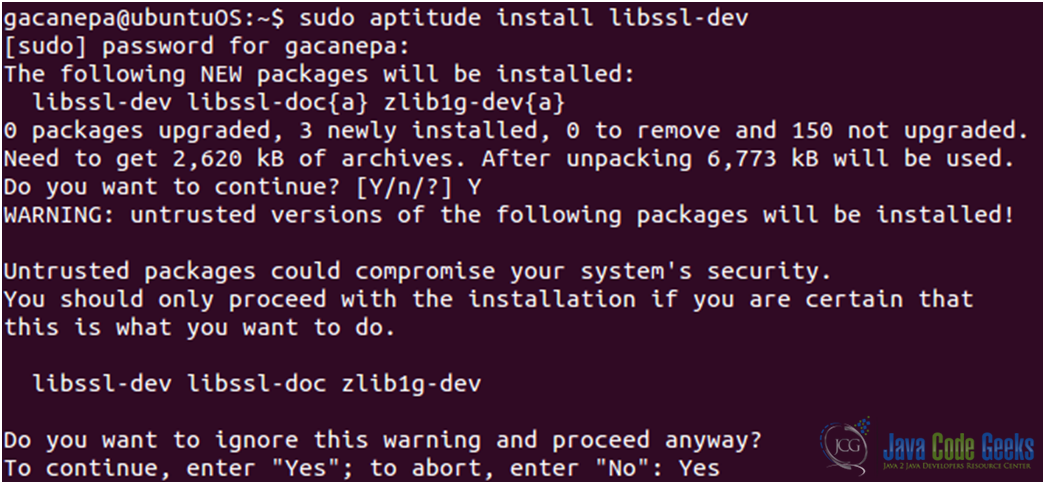
However, the ssl module requires the OpenSSL library (see Fig. 2) to be installed on the system beforehand. We will install the libssl-dev package, which includes the said library (see Fig. 3).

3. Creating, signing, and using a certificate
- We will create a directory to store our public key and ssl certificate (see Fig. 4).

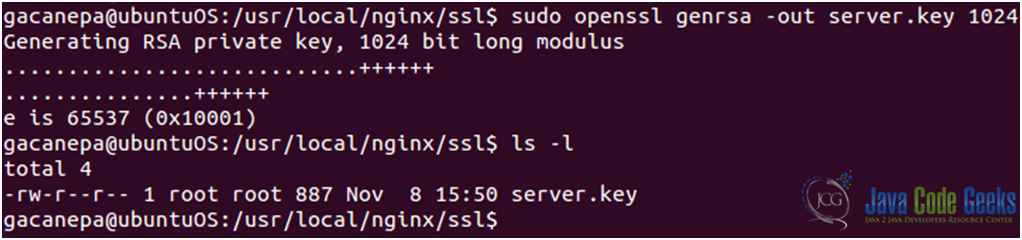
Figure 4: Creating a directory to store the public key and ssl certificate - Now let’s generate the server private key (see Fig. 5)

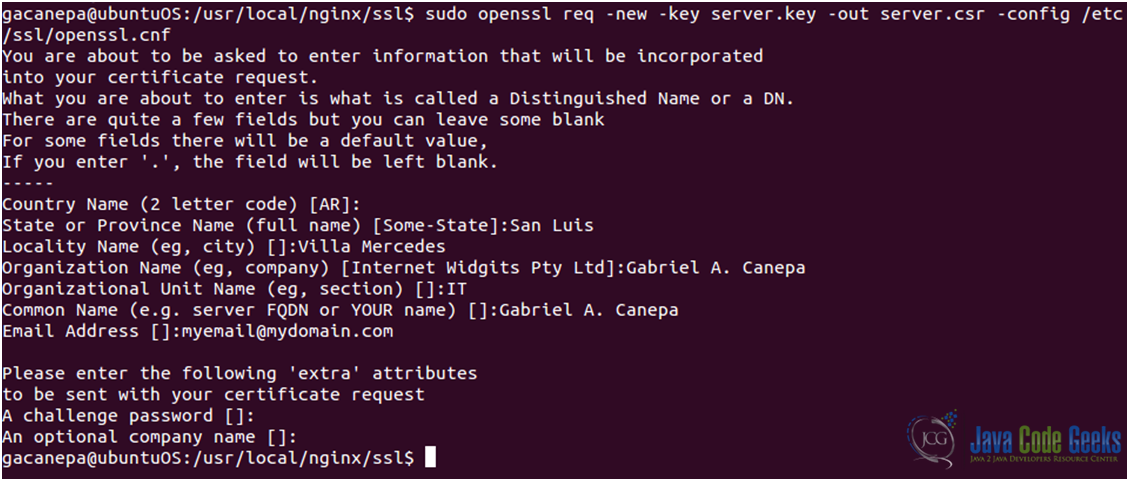
Figure 5 - Create a certificate signing request (see Fig. 6)

Figure 6 - Sign your certificate (see Fig. 7). Please note that this certificate will only last one day (you can modify this setting by changing the argument to the –
daysoption).
Figure 7: Signing your ssl certificate - Set up the certificate. Edit the nginx.conf file (see Fig. 8). Note that even though there is a ssl directive
(ssl on | off)available, it is recommended to use the ssl parameter of the listen directive instead of this directive.


It should be kept in mind that due to the HTTPS protocol limitations virtual servers should listen on different IP addresses (see Fig. 9). Refer to the nginx.conf file to perform the following modifications if needed:
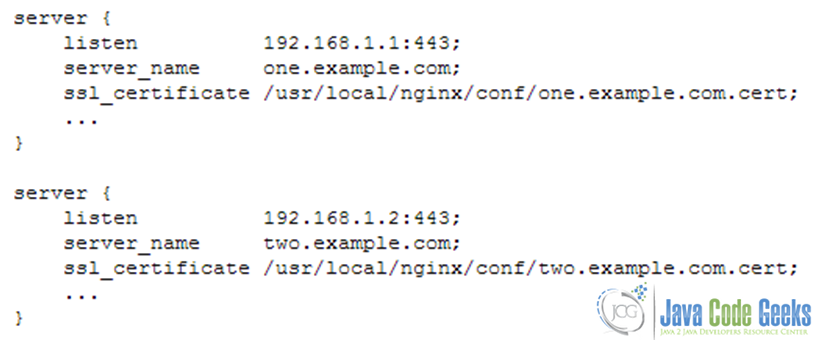
In order to allow to share a single IP address between multiple HTTPS servers is to use a certificate with a wildcard name, for example, *.example.org. A wildcard certificate secures all subdomains of the specified domain, but only on one level. This certificate matches www.example.org, but does not match example.org and www.sub.example.org. These two methods can also be combined. A certificate may contain exact and wildcard names in the SubjectAltName field, for example, example.org and *.example.org.
If we want to allow Subject Alternative Names (SANs) for our certificates we need to enable the following options in the file openssl.cnf file (located in /etc/ssl/openssl/):
1. Include the X509 Version 3 (RFC 2459) extension to allow an SSL certificate to specify multiple names that the certificate should match. We need the [ req ] section to read as follows (see Fig 10). This tells openssl to include the v3_req section while generating certificate requests:

2. Edit the [ v3_req ] section as follows (see Fig. 11):
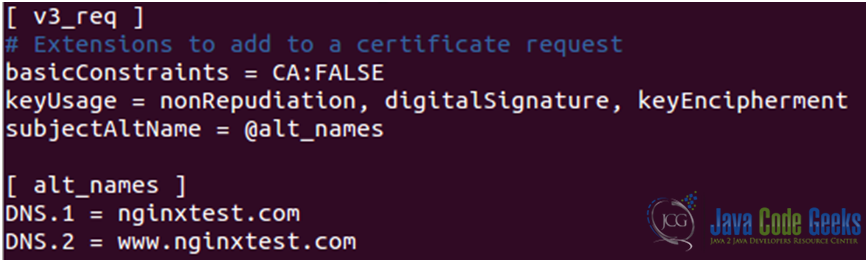
Please note that whatever we put in the file openssl.cnf will appear on all certificate requests generated from this point on: if at a later date you want to generate a CSR with different SANs, you’ll need to edit this file by hand and change the DNS.x entries.
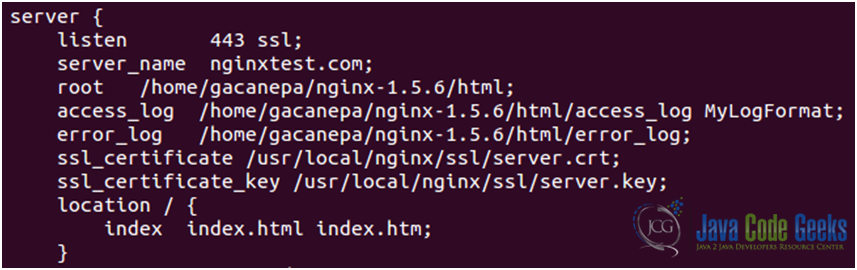
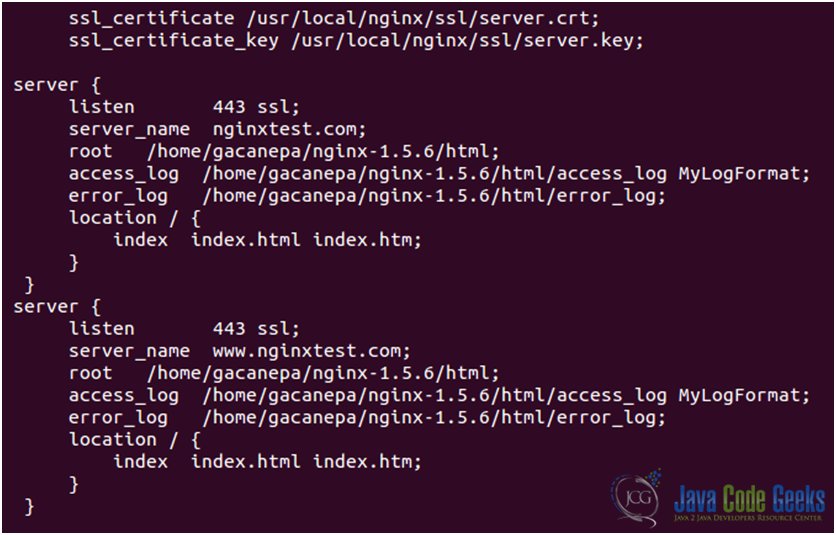
It is better to place a certificate file with several names and its private key file at the http level of configuration to inherit their single memory copy in all servers (see Fig. 12).
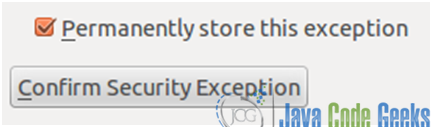
3. Now we can either browse to https://nginxtest.com or https://www.nginxtest.com and we’ll see the warning of a self-signed security certificate (see Fig. 13):

4. Click on “Add Exception” (see Fig. 14) and then on “Confirm Security Exception”:
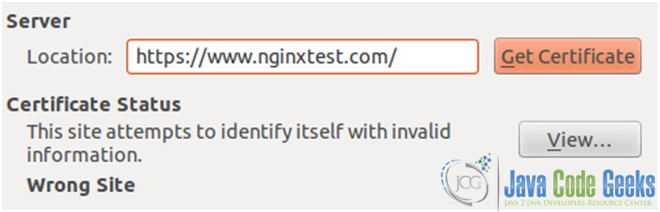
If you get a Wrong Site message (see Fig. 15), it means that your certificate belongs to a different site, or that the necessary SANs have not been specified.
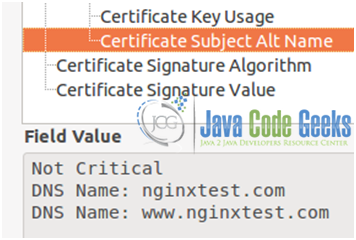
On the other hand, when the SANs have been defined correctly, they can be viewed using the browser’s built-in certificate viewer (see Fig. 16).
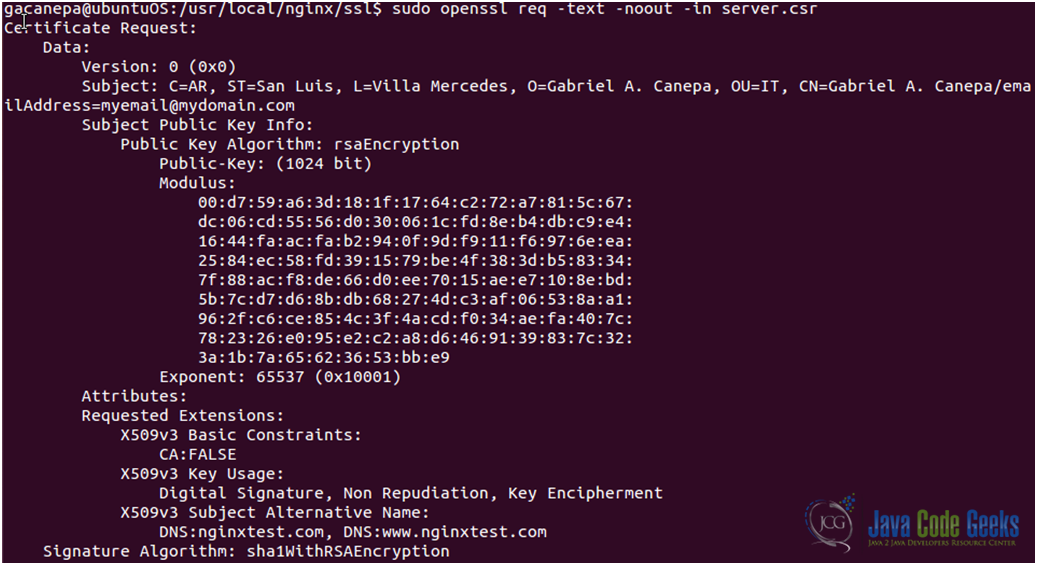
or using (see Fig. 17)
openssl req –text –noout –in server.csr from the command line
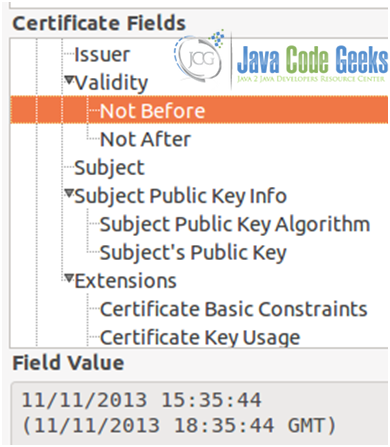
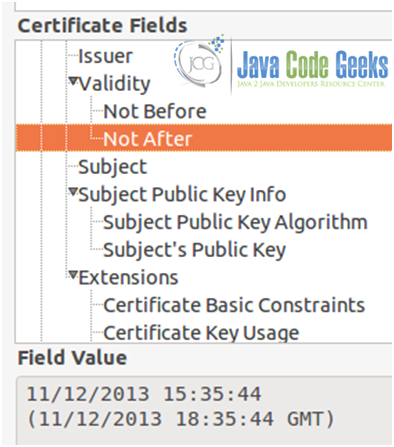
As we mentioned earlier, a certificate will only be valid within the time frame that was specified when it was first created (1 day, in our case, refer to Figs. 18a, 18b, and 18c)
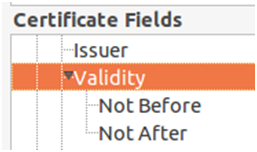
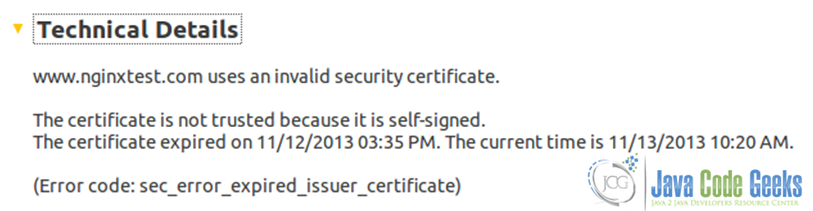
Once that period of time is over, the certificate will expire (see Fig. 19).
Unless you have a certificate from a trusted third party, your users will get the same warning as above in Fig. 13. Aside from the fact that it looks unprofessional, it’s also a real risk due to the fact that in a large organization, it is not likely that all users will know the difference between a legitimate key generated by your IT department, and keys generated by a malicious third party. In this case, you need to buy a certificate from a trusted third party, such as GeoTrust (used by Google), Digicert, Comodo, Thawte, or VeriSign (used by Facebook, for example). For other cases, especially when you want to use https for your own use (i.e. securing your admin panel), a self-signed certificate will do just fine.
4. Download the Nginx SSL configuration guide files
Here you can download the Nginx SSL configuration guide files used in this tutorial: ConfigFile.zip
Also you can download a usefull pdf file: Openssl.pdf
| [1]: The Linux Documentation Project |
| [2]: Image source: Nginx Wiki |
