This article is part of our Academy Course titled Introduction to Nginx.
This course will introduce you to the magic of nginx. You will learn to install and configure nginx for a variety of software platforms and how to integrate it with Apache. Additionally, you will get involved with more advanced concepts like Load Balancing, SSL configuration and Websockets proxying. Check it out here!

Table Of Contents
1. Introduction – The need for load balancing
Load balancing is a networking method for distributing workloads across multiple computing resources, such as servers, a server cluster (a group of servers that work together in such a way that they can be viewed as a single system), network links, CPUs, or other hardware components [1]. This technique is aimed at increasing both the capacity (supporting a large number of concurrent users) and the reliability of the backend applications by decreasing (or balancing, to be more accurate) the burden on individual servers or nodes. For that same reason, load balancing also provides redundancy and disaster recovery capabilities.
Using Nginx, we will set up a layer-7 load balancer (which will distribute requests based upon data found in application layer protocols such as HTTP and FTP).
2. Necessary modules
In order for us to set up a load balancer, we will need 2 modules: the proxy module and the upstream module. Both are built into Nginx by default.
As before, we will work with the nginx.conf file, which is located in the /usr/local/nginx/conf directory.
2.1. upstream module
Insert an upstream directive block inside http { } (see Fig. 1). You can name this block as you like (app_rack in the example below).
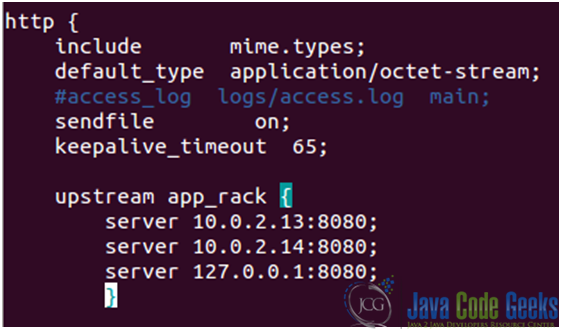
The server directive assigns the name and the parameters of server. “Name” can be a domain name, an IP address, port or unix socket. If domain name resolves to several addresses, then all are used. There are several extra parameters available, but we will explore them later.
- 10.0.2.13 is the IP address of a Debian Wheezy 7.2 server where Apache is listening on port 8080.
- 10.0.2.14 is the IP address of a CentOS 6.4 server where Apache is listening on port 8080.
- Finally, 127.0.0.1 is the IP address of the loopback interface, where Apache is listening on port 8080 in the same physical server where Nginx is running on port 80.
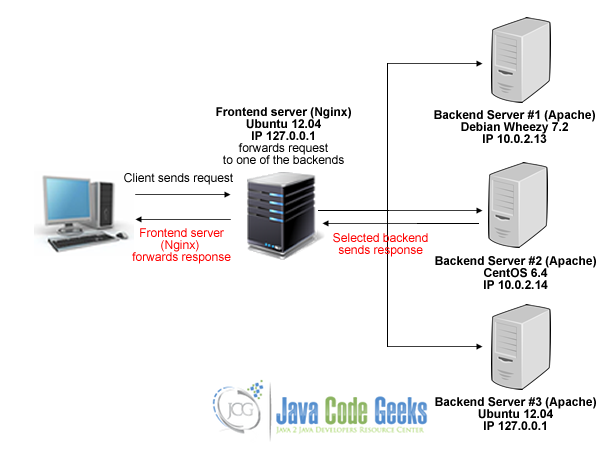
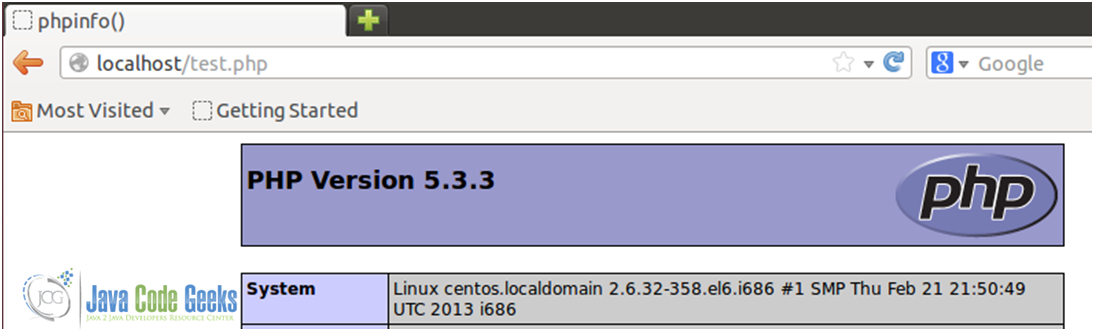
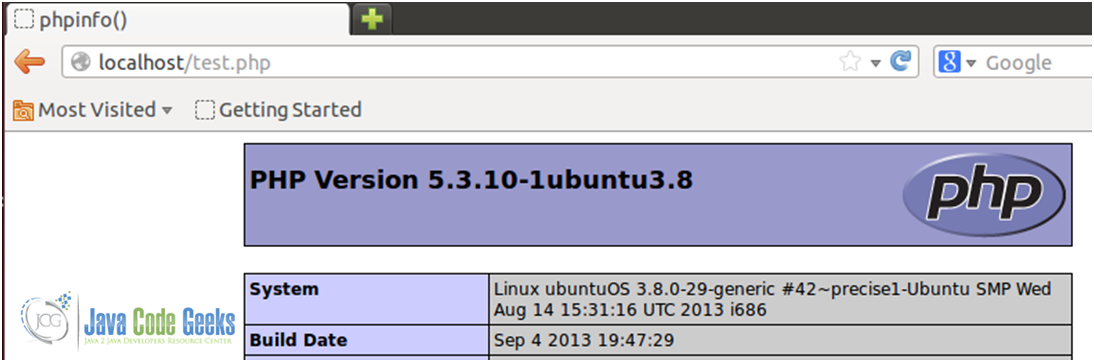
This way we have three servers – all of them running a simple PHP script that can be served by an instance of Apache (see Fig. 2).
As we mentioned earlier, the server directive that appears within upstream blocks accepts several parameters that influence the backend selection by Nginx:
- weight=n: if this parameter is placed after a server name, that server will be selected “n-times” more often.
- max_fails=n: This defines the number of timed-out connections that should occur (in the time frame specified with the fail_timeout parameter below) before Nginx considers the server inoperative.
- fail_timeout=n: If Nginx fails to communicate with the backend server max_fails times over fail_timeout seconds, the server is considered inoperative.
- down: this server is no longer used. This only applies when the ip_hash directive is enabled.
- backup: if a backend server is marked as backup, Nginx will not make use of the server until all other servers (servers not marked as backup) are down or inoperative.
Note: There are several other parameters to use with the upstream module. For a more comprehensive list, refer to the online documentation of the upstream module.
That being said, if we want to ensure that all requests from the same visitor always get processed by the same backend server, we need to enable the ip_hash option when declaring the upstream block.
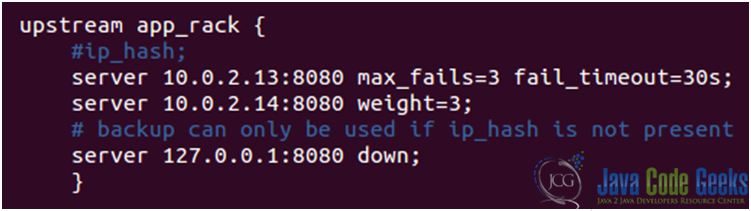
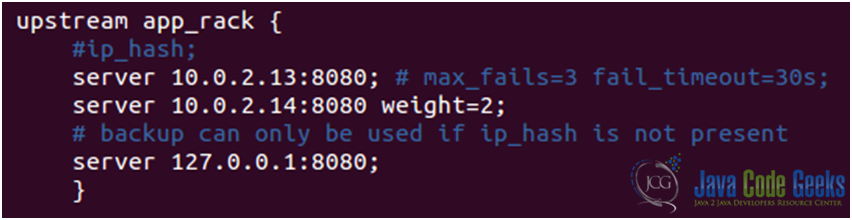
Now it is time to “play around” with the parameters discussed above. Let’s take a look at our modified nginx.conf file (see Figs. 3a and 3b).
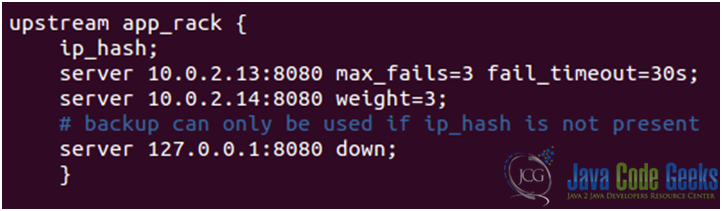
upstream block in the nginx.conf file
upstream blockWith the above settings, we can expect that the CentOS 6.4 server (IP 10.0.2.14) will get twice as much traffic as the other two backend servers. The presence of the ip_hash option will ensure that each request from a certain visitor –actually, from a certain IP- will be served by the same backend server.
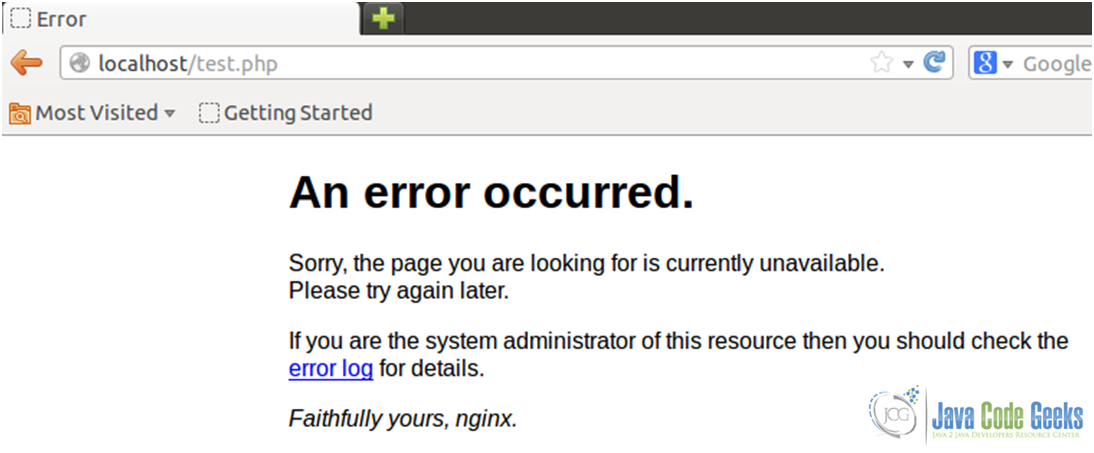
Oops! An error occurred (see Fig. 4)
Since we are instructed to take a look at the error log, that’s what we’ll do (see Fig. 5)

It seems as though all of the upstream servers are down!
The backend server #2 is pingable. So what else could be wrong? After running
netstat –npltu | grep :8080
in the CentOS 6.4 server we find out that Apache is not running. We can start it with service httpd start.
Let’s see what happens now (see Fig. 6)
The test.php file was served by the CentOS 6.4 server.
We will go ahead and edit the nginx.conf file again (see Figs. 7a and 7b).
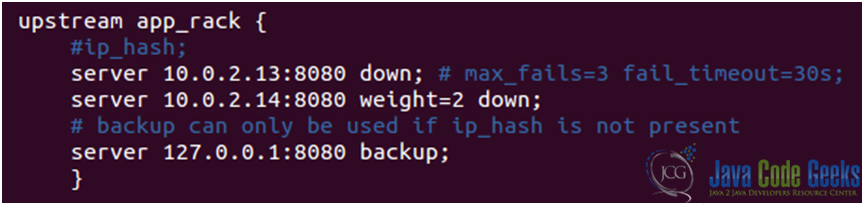
With the upstream block show in Fig. 7b, the php file will be served by the Ubuntu server (see Fig. 8)
Now, say that we have an application (running on the 3 servers) that is drawing high traffic. How can we know which server is receiving each request from the frontend server? That is where the embedded variable $upstream_addr –which is built-in into the upstream module- and the log_format directive come into play.
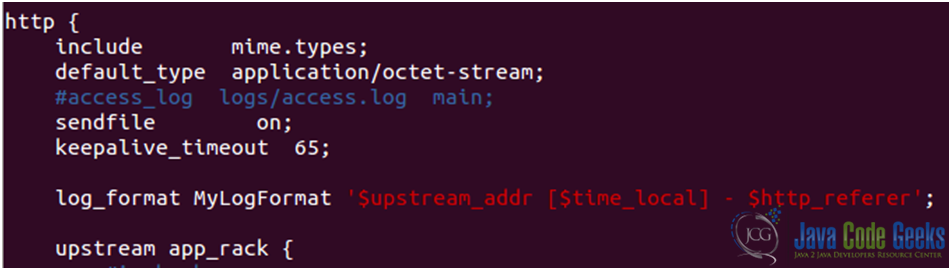
- Define a custom log_format (MyLogFormat in the example below) at http level in the main configuration file (see Fig. 9)

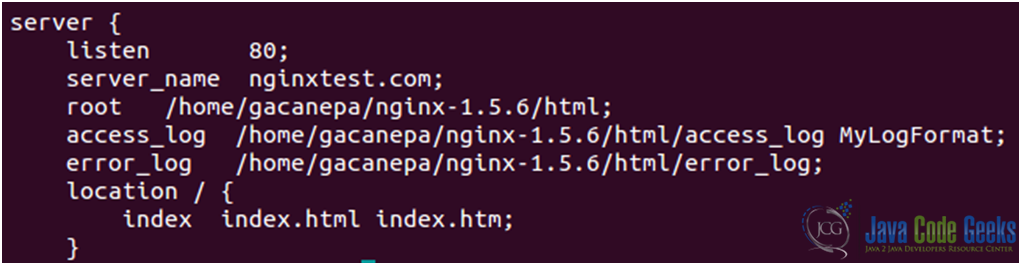
Figure 9: Creating a custom log format - Use the log format created earlier with one of the logs (see Fig. 10)
Now let’s modify the upstream block once again (see Fig. 11) in order to forward traffic to the 3 servers.
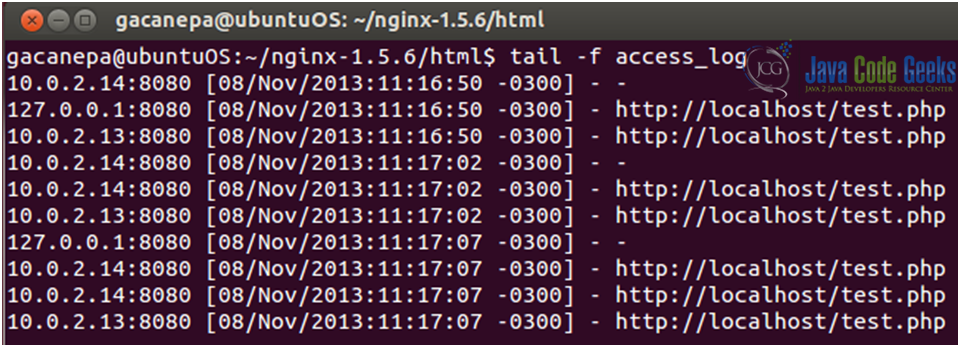
Now restart Nginx and, finally, let’s see what the access log shows (see Fig. 12) after refreshing the browser’s windows a couple of times:
3. Download the configuration file
You can download the configuration file of this tutorial: LoadBalance_conf.zip
| [1]: Definition adapted from Wikipedia’s page |
