If you’ve ever managed workstation printer installations for a decent-sized Windows environment, you likely already know that it can be challenging at times. But if you’re just now gearing up for the first time to do some deeper management in this area, this article should prove to be very helpful!
NOTE 1: I’ve seen some very short, concise posts or articles online stating that “setting a default printer for all new users is a quick process involving only a couple of steps”. I can tell you from experience though that this is not the case. If you’ve ever tried to set a default printer for all new users on any Windows workstation, you likely found the same thing that I found: it’s not a short/simple process. Granted, it’s not difficult, but it does require a few extra steps that are well worth the time!
NOTE 2: The information I’m about to provide is geared towards new workstation deployments, or workstations where multiple users will eventually be logging in (“new users” who have never logged on prior to having the workstation properly configured).
NOTE 3: It’s assumed that you have administrative access to the workstation that you’re configuring.
When a new user logs on in Windows (an account that’s never logged onto the workstation), a new user profile is built (using the “Default” user profile). We’re going to configure the Default User account so that each new user will get the same printer information when their Windows profile is built after logging in.
There are technically only two main steps involved: Setting a default printer for the current user (an admin account), then using the “Registry Editor” (along with “Notepad” to temporarily store information) to configure that same default printer for all new users.
In my example, I’ll be working with a workstation named “CP-MM-US” and a default printer named “Colony Plaza Front Desk (SHARP MX-B402SC)”.
OK, let’s dive in!
1. Set the Default Printer for the Current User
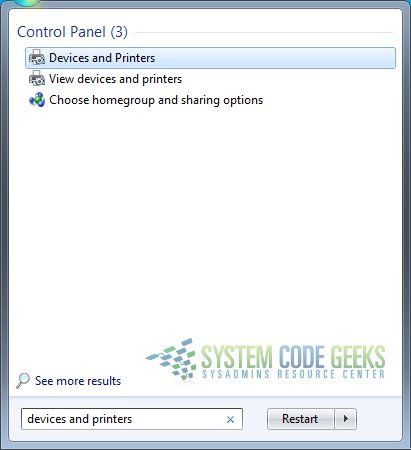
The first thing you need to do is open “Devices and Printers” and set the whichever printer you want as the default. You can access Devices and Printers by searching for it from the Start menu. Refer to Figure 1a below:
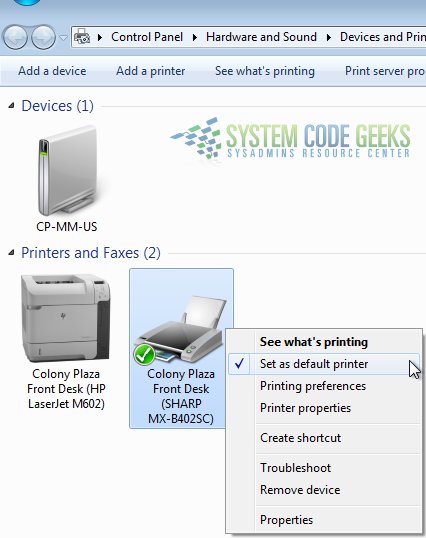
Once you have Devices and Printers open, you can verify the default printer. If a default printer is set, you should see a green check emblem on it. If no default printer is set, you won’t see a green check at all.
To set a default printer, simply right-click on the printer that you want to set as the default and choose “Set as default printer”. Refer to Figure 1b below:
2. Configure a Default Printer for All New Users
After setting a default printer, all of the information for that device (and its associated user profile) is stored in the Windows registry. We’re going to copy all of that pertinent registry information from the current user account into a notepad file, then load the Default User hive and apply that same information.
2.1 Open Notepad
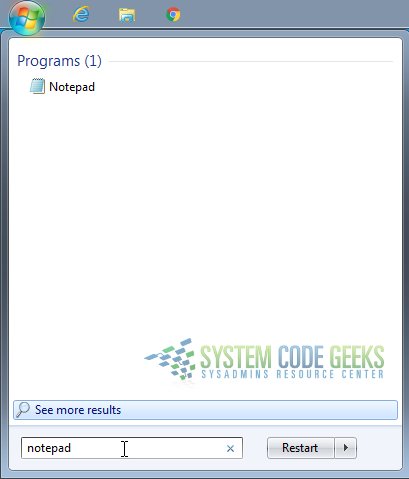
You can access Notepad by searching for it from the Start menu. Refer to Figure 2.1 below:
2.2 Open the Registry Editor
You can access the Registry Editor by searching for it from the Start menu. Refer to Figure 2.2a below:
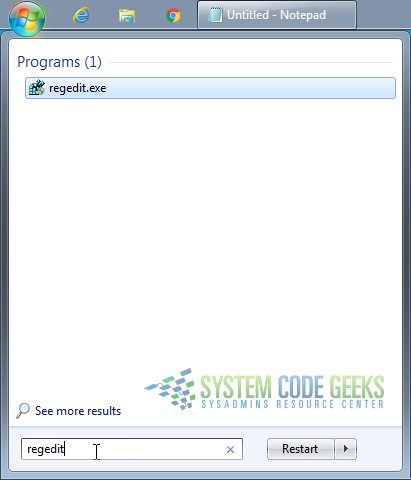
NOTE: If you’re prompted by UAC, click “Yes”. Refer to Figure 2.2b below:
2.3 “Stack” your Windows
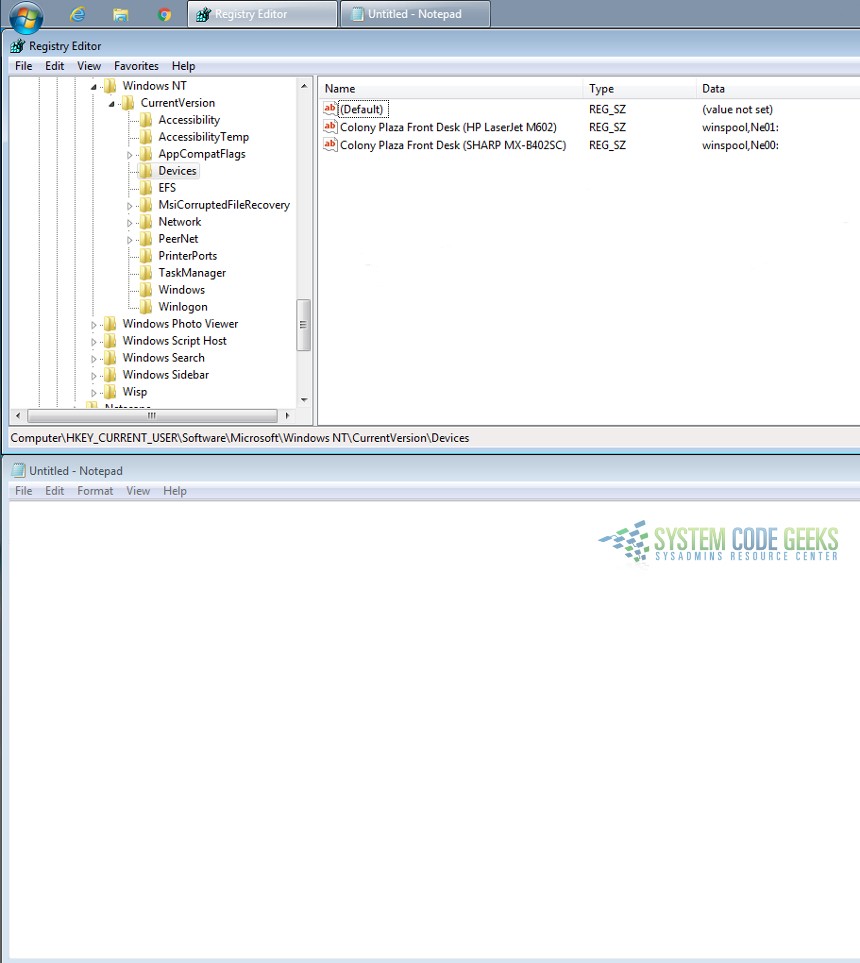
Since you’ll be working back and forth between the Notepad and the Registry Editor, it’s easiest to “stack” your windows so you can see them both at the same time. Refer to Figure 2.3 below:
2.4 Copy the Information/Data from the Appropriate Keys
Now you’re going to copy registry information into your notepad file from three different keys: “Devices”, “PrinterPorts” and “Windows”. This information will later be copied and pasted when creating/modifying information in the Default User hive (it’s much faster this way, and it ensures no typing mistakes are made since the data is being copied and pasted).
NOTE: The information that I provide in my screenshots specifically pertains to the printer from my examples. My screenshots are references to the specific information that you’ll be copying from your own unique printer installation.
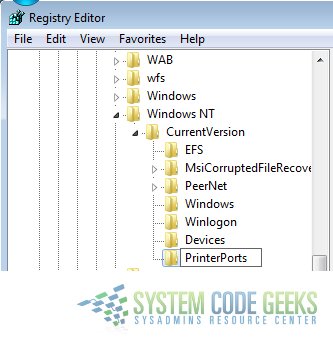
In the Registry Editor, navigate to the following path in the registry tree (this is the branch of the tree where your copied information will come from):
HKEY_CURRENT_USER\Software\Microsoft\Windows NT\CurrentVersion\
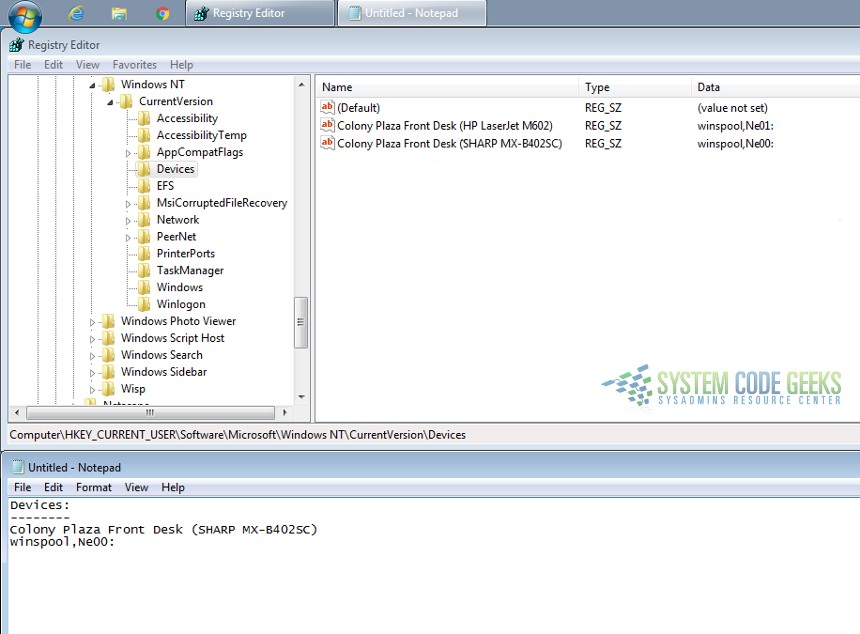
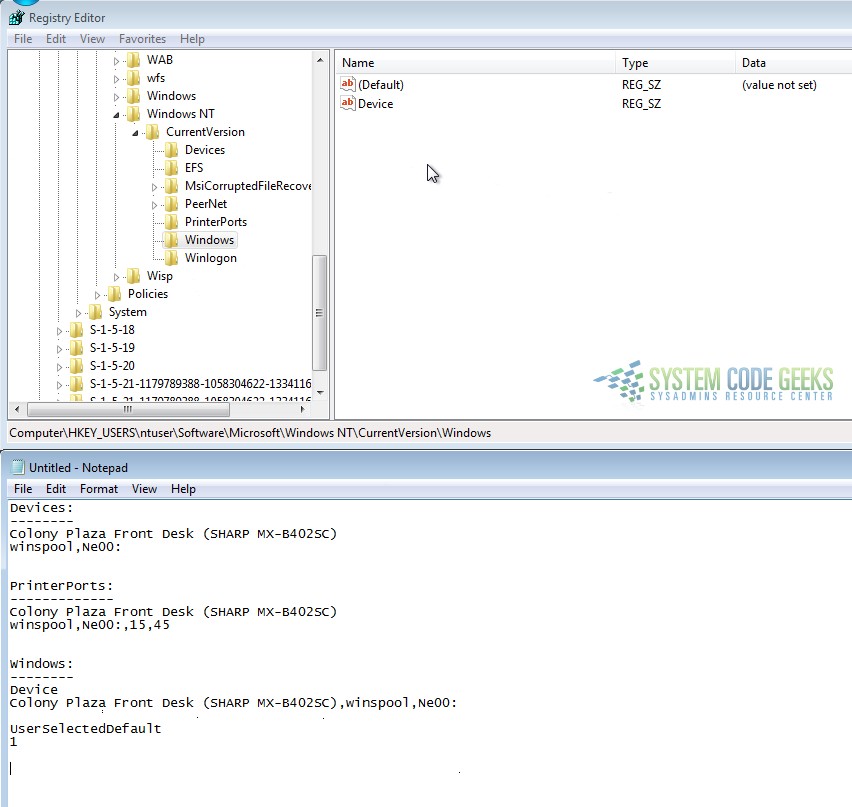
Click on the “Devices” subkey and you’ll see a list of printers in the pane to the right. Copy the information from the printer that matches the default that you set in Step 1. In my example, it’s the SHARP printer. You can see where I copied the “Name” and “Data” from the appropriate string and added it to my Notepad file.
As I move forward in this how-to, you’ll notice that I create sections in my Notepad file for each key and its related information (and I continue to do this as we collect the information from each related sub-key). This ensures that you won’t make a mistake or lose track of the collected information and what it pertains to. Refer to Figure 2.4a below:
Next, you’ll click on the “PrinterPorts” subkey. Again you’ll notice that there is a printer in the right pane that matches your default. Copy the information into your Notepad file. Refer to Figure 2.4b below:

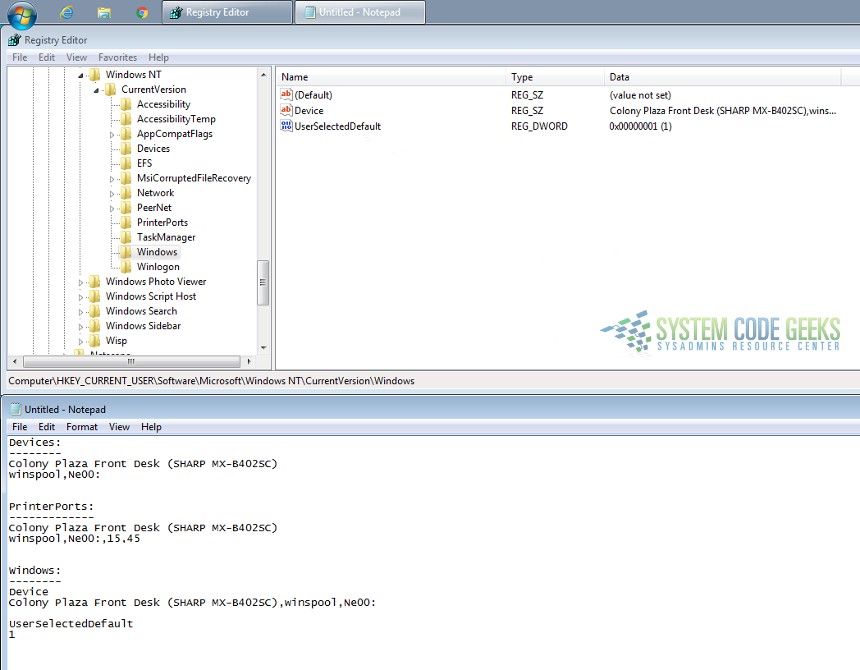
Lastly, you’ll click on the “Windows” subkey and copy the appropriate information into your Notepad file. Refer to Figure 2.4c below:
2.5 Load the Default User Hive
Now that you’ve copied all of the data and information from the current user, you’re going to load the Default User registry hive so you can modify the data to match all of the information from the current user profile.
Before doing that, we need to first navigate to another branch in the tree (this is the location where we’re going to load the hive from). Highlight the following key:
HKEY_USERS\
Once the above key is highlighted, to load the appropriate hive, click on “File” –> “Load Hive”. Refer to Figure 2.5a below:

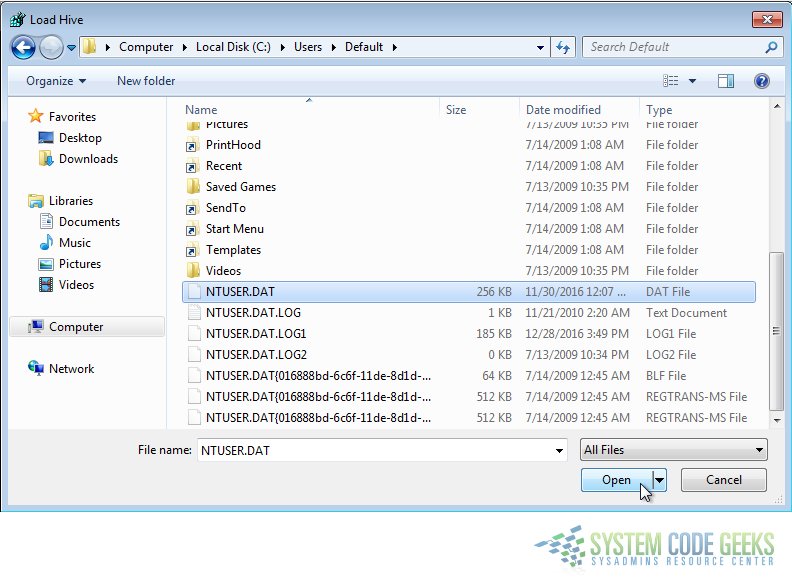
You’ll be prompted to choose a file. Navigate to “C:\Users\Default”, select the “NTUSER.DAT” file and click “Open”. Refer to Figure 2.5b below:
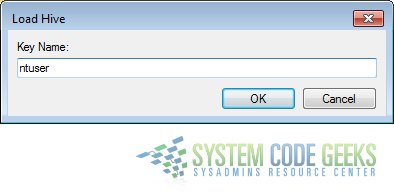
Next you’ll be prompted to give the hive key a name. In my example, I named it “ntuser”. Refer to Figure 2.5c below:
2.6 Create/Edit the Missing Keys & Data
Once the hive is loaded, you’ll need to navigate to the following branch of the registry tree:
HKEY_USERS\ntuser\Software\Microsoft\Windows NT\CurrentVersion\
You’ll likely notice that two of the necessary sub-keys are missing from this profile (“Devices” and “PrinterPorts”), so you’ll need to manually create them.
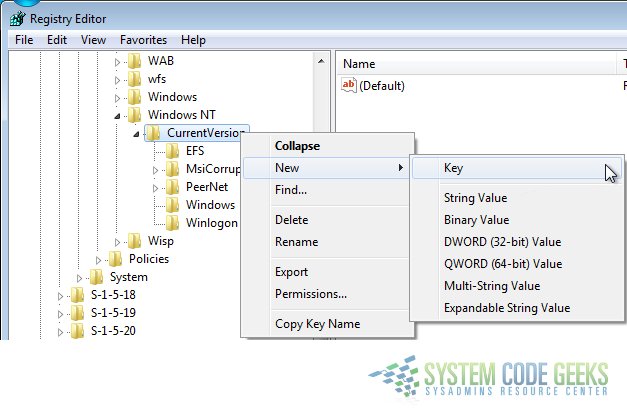
First you’ll create the “Devices” key. To do this, right-click the “CurrentVersion” key, choose “New”, then “Key”. Refer to Figure 2.6a below:
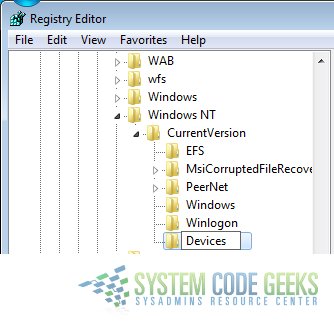
Type “Devices” for the key name. Refer to Figure 2.6b below:
Now you can create the “PrinterPorts” key. Repeat the same process as before to create this key, and name it “PrinterPorts”. Refer to Figure 2.6c below:
The printer information needs to be added now. Before proceeding, go back to your Notepad file and copy the printer name from the Devices section (“Colony Plaza Front Desk (SHARP MX-B402SC)” in my example). Once you have that info copied, click on the “Devices” key that you created earlier.
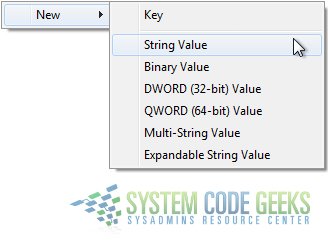
You’ll need to create a new string (REG_SZ) and name it based on the information that you collected into your Notepad file earlier. To create this string value, right-click on the “Devices” key, choose “New”, then “String Value”. Refer to Figure 2.6d below:
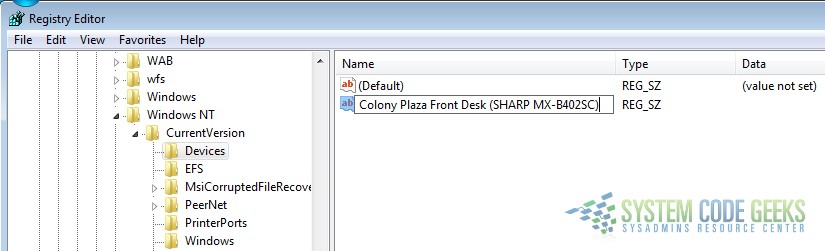
At this point, you should be able to paste the printer name that you copied a moment ago. Refer to Figure 2.6e below:
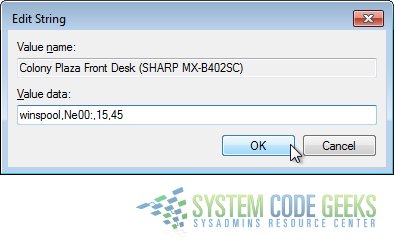
Once the string has been named, double-click it to edit the value data (or press the Enter key when it’s highlighted). Copy the appropriate value from your Notepad file and paste it into the “Value data” field in the “Edit String” window. Refer to Figure 2.6f below:

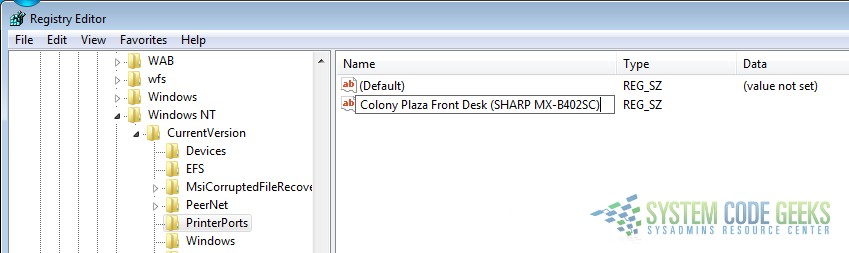
Navigate now to the “PrinterPorts” key and repeat the same basic steps that you just did with the Devices key. Create a new string and name it based on the information that you collected in your Notepad file earlier (under the “PrinterPorts” section). Refer to Figure 2.6g below:
Again, once the new string has been named, double-click it to edit the value data. Copy the appropriate value from your Notepad file and paste it into the “Value data” field in the “Edit String” window. Refer to Figure 2.6h below:
The last key/data left to modify is located under the “Windows” key. The “Device” string already exists under this key, so you won’t have to manually create it. Refer to Figure 2.6i below:
Modify the Device string by double-clicking it and pasting the appropriate value data from your Notepad file. Refer to Figure 2.6j below:

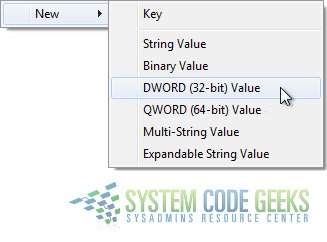
There’s one extra piece of data that needs to be created/added under the Windows key; a “DWORD”. Right-click the Windows key and choose “New”, then “DWORD (32-bit) Value”. Refer to Figure 2.6k below:
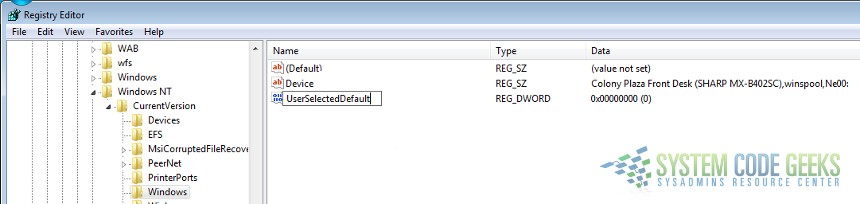
Paste the DWORD name from your Notepad file (“UserSelectedDefault”). Refer to Figure 2.6l below:
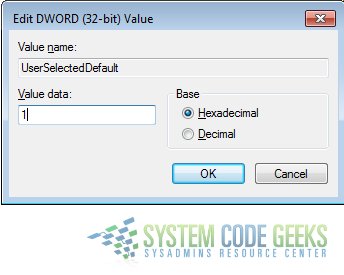
Give it a value data of “1”. Refer to Figure 2.6m below:
2.7 Unload the Default User Hive
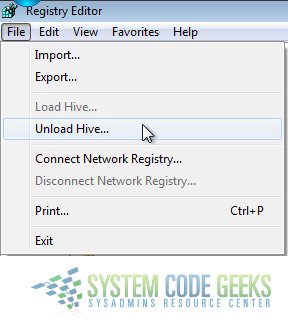
Now that all of the appropriate registry information has been added to the default user profile, it essentially needs to be saved by unloading the hive. To do this, highlight the “ntuser” key, then click on “File” –> “Unload Hive”. Refer to Figure 2.7a below:
You will be prompted to confirm – Click “Yes”. Refer to Figure 2.7b below:

You can now close the registry editor and be confident that the correct default printer will be applied to all new user profiles!
3. Summary
The process I just covered may seem a little “intensive”, but it’s definitely worth the time and effort; especially if you deploy a lot of new workstations in your Windows environment. These steps may seem time consuming, but once you’re familiar with them, this process does not take long at all. The average time for me to setup one workstation using this process is around 5 minutes.
Thanks for reading my how-to – I hope you find this information useful! 🙂

Seeing HKCU/Software/Microsoft/Windows NT/CurrentVersion/Windows with
LegacyDefaultPrinterMode REG_DWORD 1
Essentially the same function as UserSelectedDefault ?
These instructions were written with Windows 7 in mind. The setting you referenced may work as well, but since I’m not familiar with it, I’d have to research/test it to know for sure. Thanks for mentioning it.