Have you ever needed to install printers on a workstation, and you thought to yourself, “If only I could quickly copy the installed printers from another PC, it would save me so much time!”? Well, today’s your lucky day!
Microsoft has actually had a way of accomplishing this for many years (a separate utility named “Print Migrator”, which has since been retired), but it wasn’t until Windows 7 was released that they finally baked it right into the OS with the “Print Management” tool.
Today I’ll be showing you how to leverage this handy tool to quickly and easily copy printers from one PC to another by bundling all installed printers into an export package that can be copied to another PC, and then imported.
As I said before, all of this functionality is built right into Windows 7 and beyond, so there’s no need for third-party tools or extra utilities that would need to be downloaded.
NOTE: It’s assumed that you have administrative access to the target and source workstations that you’ll be exporting and importing printers from/to.
There are multiple methods of exporting and importing printers from one PC to another: You would either do all the work from the target PC, from the source PC, or from a non-related management workstation (directly via physical access, or via remote access using VNC, RDP, etc). No matter which method you choose, the steps are relatively all the same: Verify a source workstation’s printers, export those printers as a single package file, and then import the package on a target PC.
In my example, I’ll be working through the process from a combination of these methods (And in case you’re curious, in my environment I use VNC to remotely access each of my workstations). I’ll first access the source PC (a PC named “LSL-SPARE“) to export the printers and copy the package to the target workstation. Then I’ll access the target PC to import the printer package (a PC named “CP-SPARE“). The reason I’ll be doing it this way is because it’s not uncommon for administrators to run into issues when trying to do all the work from a single PC (because the export or import process fails to complete successfully, due to various things like remote access permissions, applied group policies, etc).
OK, let’s get started!
1. Launch Print Management & Verify Source Printers
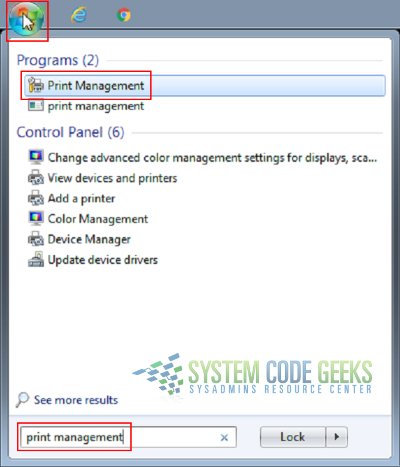
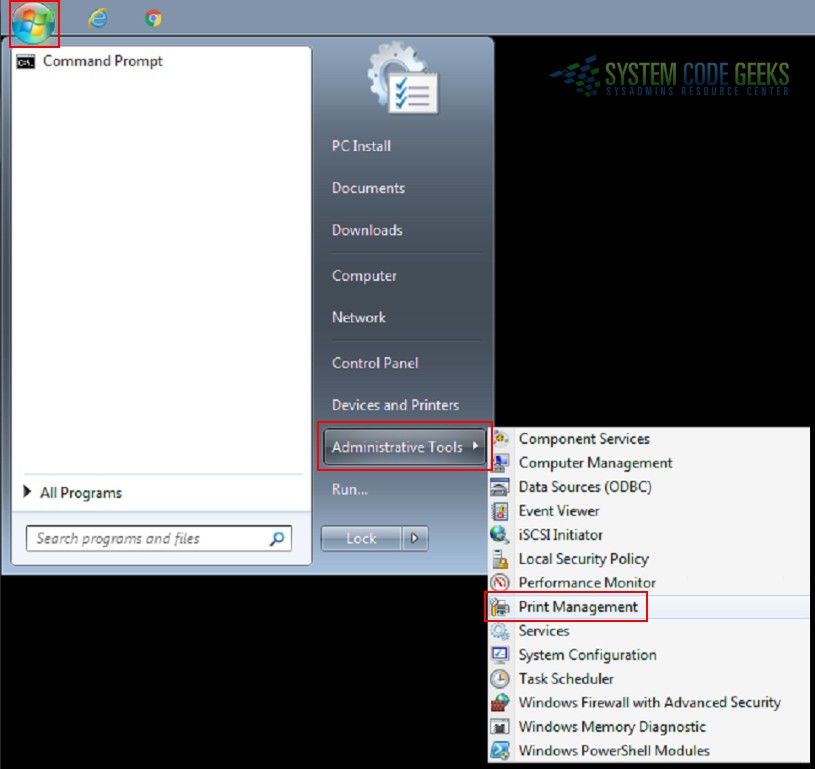
The first thing you need to do is launch the Print Management tool and verify the source printers. You can access Print Management either by searching for it from the Start menu, or by navigating to it in the Administrative Tools menu. Refer to Figure 1a and 1b below:
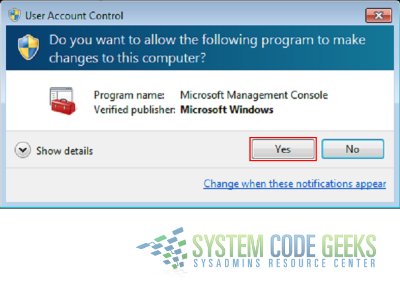
NOTE: If you’re prompted by UAC, click “Yes”. Refer to Figure 2 below:
Once you have Print Management open, you can verify the source printers. Expand the “Print Servers” menu and you will see your source server listed. It will say “local” next to it because it’s not a “remote” server; it’s essentially your “local print server”. Expand the local server menu (“LSL-SPARE” in my example), then click on “Printers”. You’ll see your printers (and all related details) listed in the right pane. Refer to Figure 3 below:
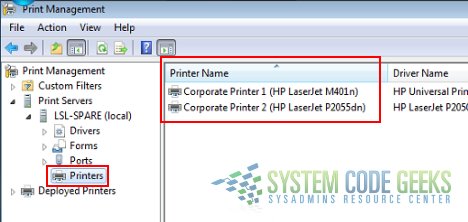
NOTE: In my example, there are only two printers listed. But I think it’s easy for you to see where this export/import feature can come in handy (especially when you have a workstation that has 3 or more printers, because it saves you from having to install each one one-at-a-time).
2. Export Source Printers to a File
Now let’s export the printers from the source workstation. Click on “Printer Servers” in the left navigation pane, then right-click on your local server (“LSL-SPARE” in my example), and choose “Export printers to a file”. Refer to Figure 4a below:

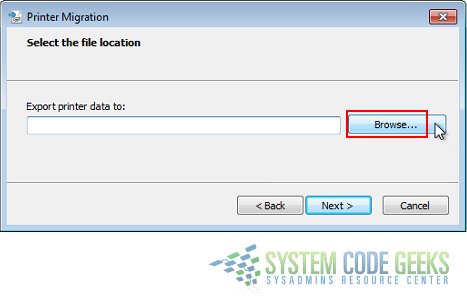
A “Printer Migration” window opens; click the “Browse” button. Refer to Figure 4b below:
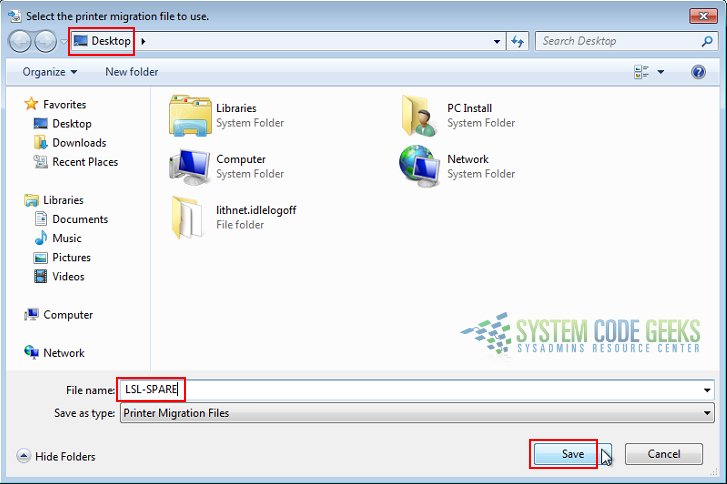
A “Select the printer migration file to use” window will open. From “Favorites” in the left navigation pane, or from the location bar at the top, select “Desktop”, give the file a name (“LSL-SPARE” in my example), then click the “Save” button. Refer to Figure 4c below:
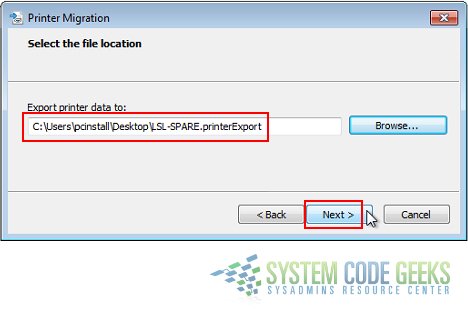
You’ll be returned to your “Printer Migration” window, and you should see your filename and location listed in the “Export printer data to” box; click “Next”. Refer to Figure 4d below:
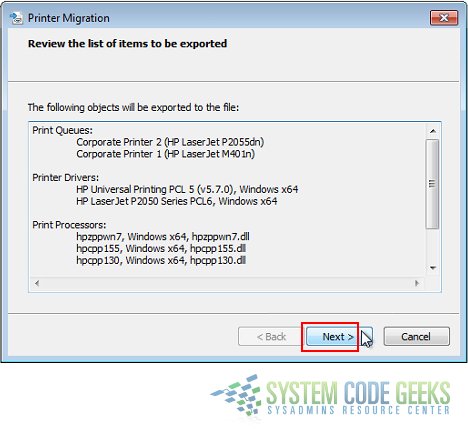
The “Printer Migration” window will display a summary of the list of items to be exported; click “Next”. Refer to Figure 4e below:
When the process has completed successfully, you will see a message indicating the “Operation completed with no errors”. Refer to Figure 4f below:
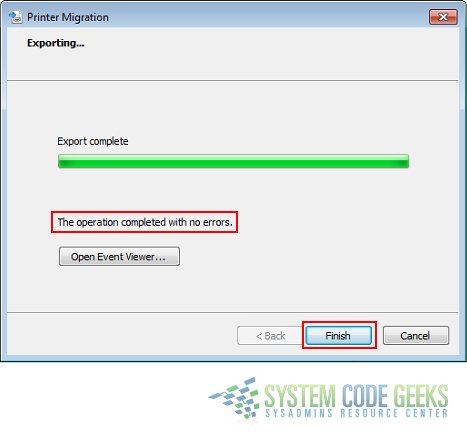
NOTE: I’ve never seen the export process fail when doing it directly from the source workstation (as in my example).
3. Copy Export Package from Source to Target
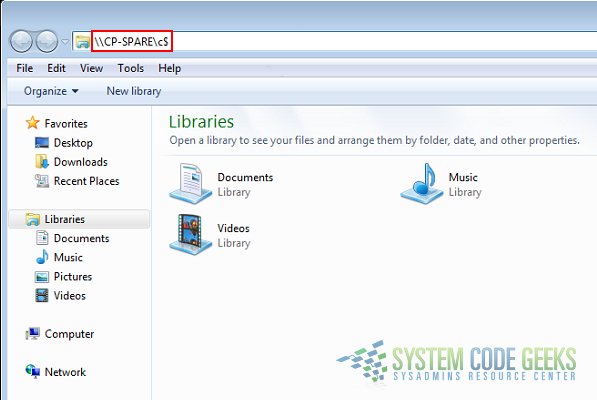
There are multiple methods that can be used to copy the file from the source workstation to the target workstation (file share, external thumb drive, etc). In our example, I’m leveraging the default hidden share for the C:\ drive on the remote workstation. This is done by opening Windows Explorer and typing the following text into the location bar and pressing the Enter key on the keyboard (substitute “<target_hostname>” with your appropriate target hostname; “CP-SPARE” in my example):
\\<target_hostname>\c$
Refer to Figure 5a below:
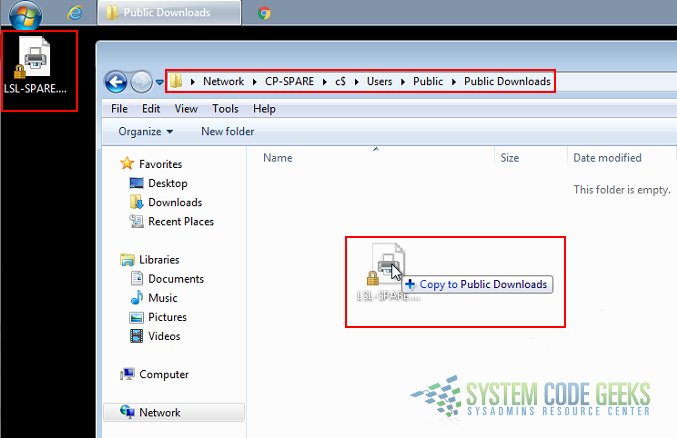
Once you’ve successfully connected to the remote target host, drill down to “Users\Public\Public Downloads”. From there, you can copy (or move) the export package from your desktop (simply drag and drop the file from your desktop to the Public Downloads folder on the remote host). Refer to Figure 5b below:
4. Import Source Printers from a File
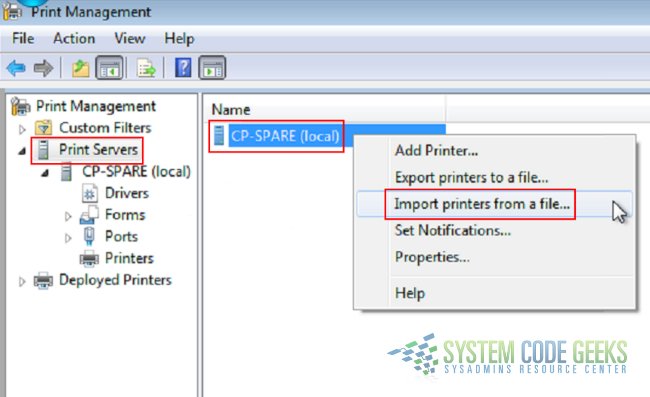
Now you’ll access your target PC and again launch the Print Management tool. Once you have the Print Management tool open, click on “Print Servers” in the left navigation pane, then right-click on your local server (“CP-SPARE” in my example), and choose “Import printers from a file”. Refer to Figure 6a below:
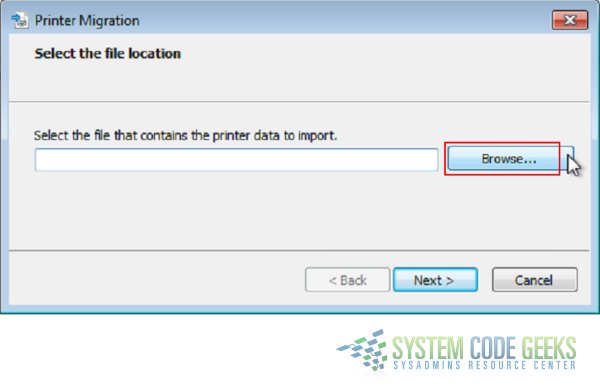
A “Printer Migration” windows opens; click the “Browse” button. Refer to Figure 6b below:
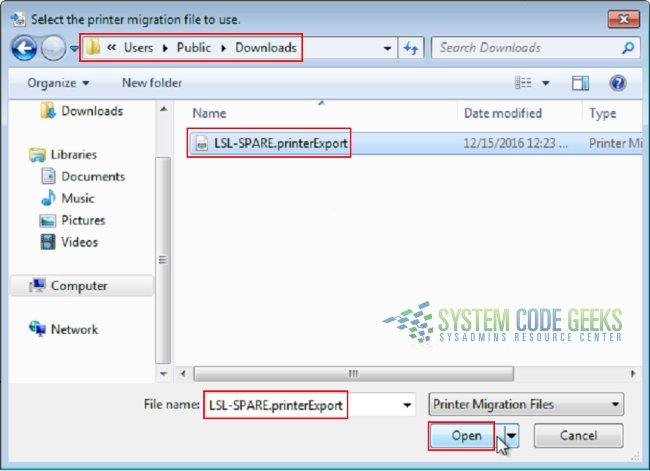
A “Select the printer migration file to use” window will open. Navigate to “C:\Users\Public\Public Downloads” (the location where you copied the export package in step 3), select the file (“LSL-SPARE.printerExport” in my example), then click the “Open” button. Refer to Figure 6c below:
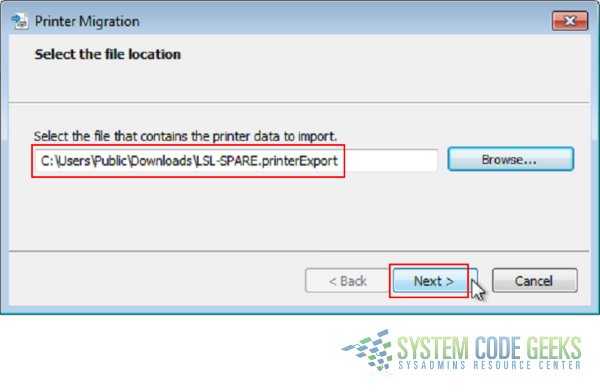
You’ll be returned to your “Printer Migration” window, and you should see your filename and location listed in the “Select the file that contains the printer data to import” box; click “Next”. Refer to Figure 6d below:
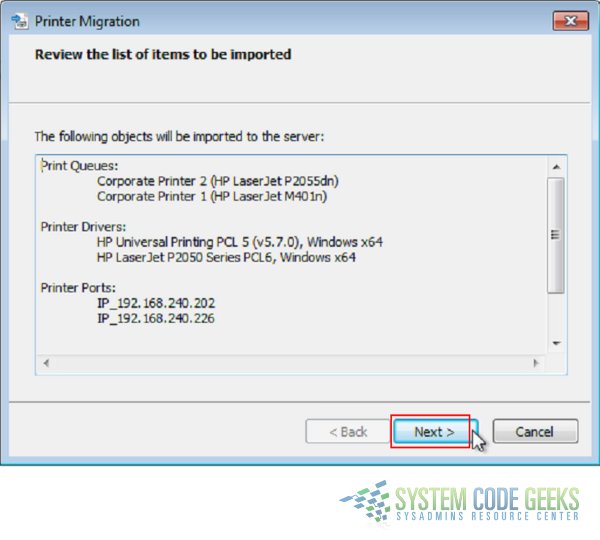
The “Printer Migration” window will display a summary of the list of items to be imported; click “Next”. Refer to Figure 6e below:
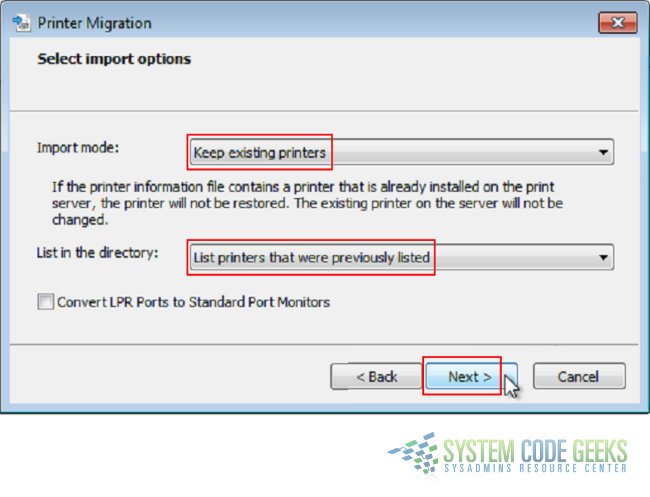
Now you’ll have a couple of extra options to choose from. In the many times that I’ve done printer migrations, I generally choose “Keep existing printers” and “List printers that were previously listed”. Choose according to your deployment scenario, then click “Next”. Refer to Figure 6f below:
When the process has completed successfully, you will see a message indicating the “Operation completed with no errors”. Refer to Figure 6g below:

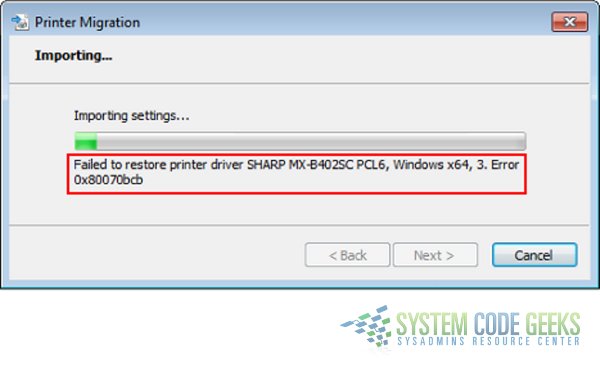
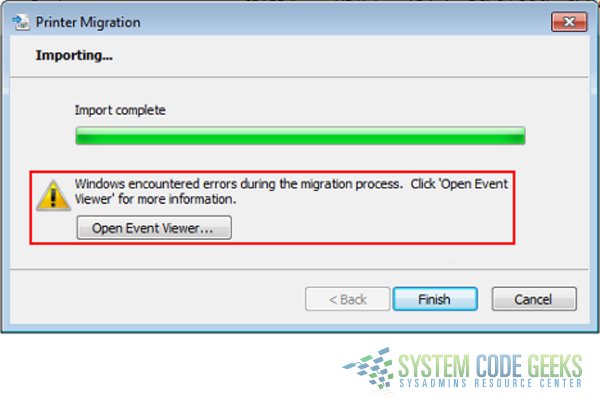
NOTE: If the import wizard has any problems during the import process, associated error messages will be displayed and events will be logged. Refer to Figure 6h, 6i and 6j below:

5. Summary
As you’ve hopefully learned from this article, exporting and importing printers using the Print Management tool is a fairly simple and straight forward process. While printer migrations don’t always “go off without a hitch”, this method of deploying printers can still save a lot of time!

How to export only a specific printer?And a way to install it from a bat file.