This article is part of our Academy Course titled PostgreSQL Database Tutorial.
In this course, we provide a compilation of PostgreSQL tutorials that will help you set up and run your own database management system. We cover a wide range of topics, from installation and configuration, to custom commands and datatypes. With our straightforward tutorials, you will be able to get your own projects up and running in minimum time. Check it out here!
With all the Relational Database Management Systems (RDBMs) out there, it may be somewhat difficult to identify the best solution for your needs and to take an informed decision as to which one to choose. Thus, in this series we will provide an introduction to PostgreSQL and share some of the reasons why you may want to consider this solution when exploring the available technologies for a database implementation.
What’s PostgreSQL?
PostgreSQL, also known by its alias Postgres, is a cross-platform object-relational database management system (ORDBMs for short). Its development started in the University of California at Berkeley in the mid ‘80s with a project they named simply POSTGRES, which did not feature SQL as query language at first. In the mid ‘90s, two students added SQL to the code inherited from the university, and PostgreSQL was born as an open-source project. Today, PostgreSQL has been long known (and has a strong reputation for) for being able to handle significant workloads with a large number of concurrent users. In addition, it provides bindings for many programming languages, making it an ideal solution for a client-server environment.

Installing PostgreSQL
In this article we will explain how to install a PostgreSQL server in Ubuntu Server 16.04 (IP address 192.168.0.54), how to load a sample database, and how to install a client application (which will serve as an administrative tool) for Linux and Windows.
Step 1 – Launch a terminal and install the server and the web-based administration tool:
sudo aptitude install postgresql phppgadmin
Step 2 – Verify that the database service is running and listening on port 5432:
systemctl is-active postgresql
sudo netstat -npltu | grep postgres
The first command should indicate that unit postgresql is Active, and the second command should show that the service is listening on the right port, as shown in Fig. 1:

Step 3 – Switch to the postgres Linux account and create a new role for queries:
The installation process created a new Linux account named postgres. By default, this is the only account with permissions to access the database prompt initially.
To switch to the postgres account, do
sudo -i -u postgres
And run the following command to create a new database role named gacanepa (enter the password twice when you’re prompted to do so):
createuser gacanepa --no-createdb --no-superuser --no-createrole --pwprompt
Although the options in the above command are self-explanatory, let’s just say that this particular role will not be allowed to create databases or roles, and will not have superuser privileges. Other options for the createuser command are available in its man page (which you can access from the Linux command prompt as man createuser).
Step 4 – Create a new database
While you’re still logged on as postgres, create a database:
createdb World_db
Populating the database with data
Once we have created the database, it’s time to populate it with actual data we can later query:
Step 5 – Download a sample database
The wiki links to several sample databases that we can download and use. For this example, we will download and install the world database, which contains countries, cities, and spoken languages, among other data.
wget http://pgfoundry.org/frs/download.php/527/world-1.0.tar.gz
tar xzf world-1.0.tar.gz
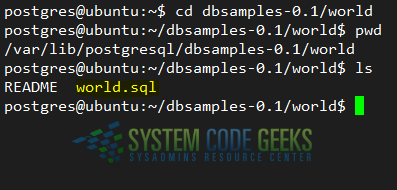
Step 6 – Restore the database dump:
The database dump file is located at dbsamples-01/world inside the current working directory, as shown in Fig. 2:
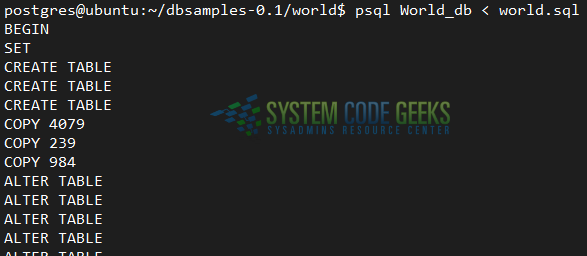
cd dbsamples-0.1/world
psql World_db < world.sql
As the tables are created and populated with data, the output should be similar to Fig. 3:
After completing the above 6 steps, we now have a fully-setup PostgreSQL database.
Configuring phppgadmin in Linux
In order to allow remote (LAN) access to the web-based administration tool, follow these steps:
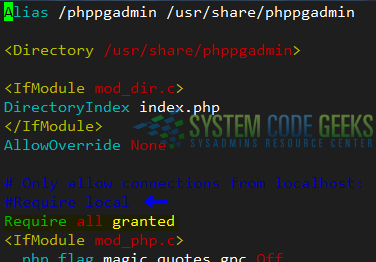
Step 7 – Integrate phppgadmin with Apache
Open /etc/apache2/conf-enabled/phppgadmin.conf, and comment out the following line:
Require local
then add
Require all granted
just below (see Fig. 4 for details)
Step 8 – Grant SELECT permissions on World_db
Switch to the postgres Linux account and open the database prompt by typing
psql
Then connect to the World_db database:
\c World_db;
Finally, grant SELECT permissions to role gacanepa, and exit (\q) the database prompt:
GRANT SELECT ON ALL TABLES IN SCHEMA public TO gacanepa;
\q
See Fig. 5 for details:

Step 9 – Restart Apache and PostgreSQL
We are almost there. Let’s restart Apache and PostgreSQL:
systemctl restart {apache2,postgresql}Step 10 – Login to phppgadmin
Point your web browser to 192.168.0.54/phppgadmin and click on PostgreSQL in the left hand section. Next, enter the role and password you created in Step 3 above, as shown in Fig. 6:

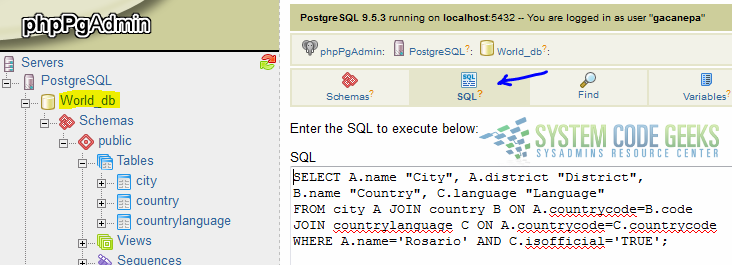
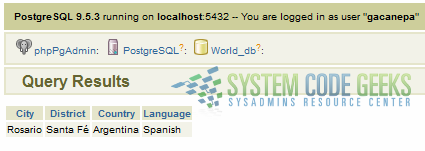
Once there, click on the World_db database and then enter a SQL query of your choice (see Fig. 7):
SELECT A.name "City", A.district "District",
B.name "Country", C.language "Language"
FROM city A JOIN country B ON A.countrycode=B.code
JOIN countrylanguage C ON A.countrycode=C.countrycode
WHERE A.name='Rosario' AND C.isofficial='TRUE';
Click Execute at the bottom. The results should be as shown in Fig. 8:
PostgreSQL Windows client
If you are using Microsoft Windows, in addition to phppgadmin (which you can access through a web browser), you can also install a client application named pgAdmin in order to connect to the database server. You can download it from the pgAdmin PostgreSQL tools page at https://www.pgadmin.org/download/windows.php. The installation will only take a few clicks.
When you’re done with the installation, make sure the following lines are present in the configuration files. Otherwise, you will NOT be able to connect to the database server from a machine other than where you installed and running.
In /etc/postgresql/9.5/main/postgresql.conf:
listen_addresses = '*'
will ensure the database server is listening on all interfaces, and because of the following line in /etc/postgresql/9.5/main/pg_hba.conf:
host all all 192.168.0.0/24 md5
you can now connect to the database server from any machine in the 192.168.0.0/24 network.
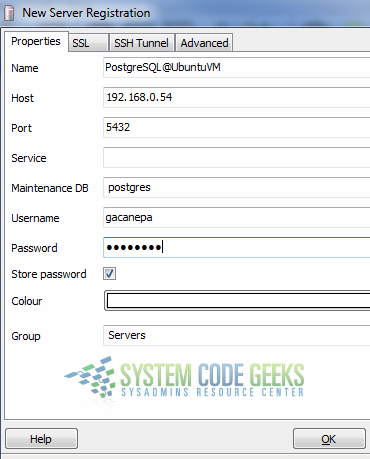
Once you added the above lines, open pgAdmin from Start → All programs → pgAdmin III. Then click on File → Add server and fill the connection details (see Fig. 9). If you fill the password box as shown below, the credentials will be saved in plain text in your user profile. If you are using a shared computer that is probably not a good idea, so you may want to leave that field blank if that’s the case:
Congratulations! You have successfully installed a PostgreSQL database server and are now able to access it both from a web interface and using a client application.
